Difficulty Level: Easy-Medium
Welcome! We are two girls who LOVE to craft! We hope that our how-to videos, pictures, and step-by-step tutorials will help you find inspiration and that you will enjoy our blog! Email us at thecraftygirlsblog@gmail.com with any questions, comments, or requests! Thanks!
Showing posts with label easy. Show all posts
Wednesday, March 30, 2016
Clay Charms (And Cheap Glaze)
Saturday, March 26, 2016
Sculptures Made With FREE Clay!
Difficulty Level: Easy
Fine.
In 50% of small, natural ponds, the bed will be made of clay. It will have a more sticky consistency than mud and it would hold together better. This isn't the smooth, white stuff you buy at the store. It's lumpy, brown, and filled with small stones. But when you mash it around with your hands, warm it up, and pick out the stones, it becomes an awesome material to work with, and it doesn't cost a cent. Only collect clay from ponds you can go to, and don't go on any private property to collect it. Sculpt what you want. You may have to add some water, because it might be kinda crumbly. Then bake it for about five to ten minutes in a 250 degree oven until it's hard. Don't over-bake it, or else it might split. That's pretty much it! Have fun!
Thursday, March 17, 2016
How To Make Popsicle Stick Bracelets!
Difficulty Level: Easy
These are simple, cute, and good to make for young kids to decorate! All you'll need are popsicle sticks, cups, and whatever decorating things (markers, stickers, paper, fabric scraps, yarn, etc.) you want to use.
Begin by bringing a pot of water to a boil on the stove, then remove it from the flame. Place the popsicle sticks in the hot water and let them soak for an hour or two, adding more boiling water every half hour. Soon, they should be bendy and pliable. One by one, gently bend the popsicle sticks onto a curved shape and let them rest in the mouth of the glass. Remember that they need to be the right size to comfortably fit around your wrist. Let them dry for about 24 hours, then pop them out. Now it's time to decorate! In the picture, we glued on patterned paper, but that's only ONE of the many different styles you can make! Have fun!
Monday, March 14, 2016
How To Make A Friendship Bracelet
Difficulty Level: Easy
Hi Crafters! These bracelets, known as "snake around the pole" bracelets, are super quick and easy to make. All you'll need is some embroidery thread, (which is really cheap and easy to find at any crafts store) tape, and scissors! Let's get crafting!
First cut about six inches of each color of embroidery thread you want to use. Three colors is the best. Fold each length of thread in half, like so:
Gather them all together, making sure that the same ends are next to one another, and then tie a knot at the end with the loops.
Get some masking tape and tape the end down on your work surface. This will keep the bracelet in place.
Separate one strand of string from the others.
Cross it over the rest of the thread...
Bring it around underneath the main threads and over top of the first part of the thread.
Now pull it tight! Here you have the first part. You can't see it too well yet, but just wait. Do it again.
Keep going. You should see a part rising up and twisting around. Now do you see why it's called "snake around the pole"?
When you're ready for the next color, pull out one strand of that color and keep going with it, leaving the first strand you started with in with the rest of the group.
Keep going. Add the other color.
When it's long enough, you're done! Tie a knot at the end to keep it in place.
Tie it around your wrist and voila! You have an easy snake-around-the-pole friendship bracelet! You can make these in all sorts of colors. Have fun!
Friday, March 11, 2016
How To Fold A Simple Origami Rose
Difficulty Level: Easy
There's lots of fancy, complicated origami flowers, but this is one of the easiest. All you'll need is a square piece of paper!
Fold the paper in half lengthwise, then again, so that you end up with a small square.Now unfold it. There should be a + sign in the middle of the paper.
Fold one corner of the paper down so that the very tip touches the point where the two lines intersect.
Do the same thing with the other three corners.
Then fold in each corner again, so that it looks like this.
And, (last time!) fold in each corner again.
Fold out each corner slightly like it shows in the corner. It shouldn't be completely flat out.
Then fold out the next bits inside the same way.
And finally, the last ones. Here you have it- a simple origami rose!Thursday, March 10, 2016
How To Make Duct Tape Bows!
Difficulty Level: Easy
These simple bows are easy and fun to make! All you'll need is duct tape, scissors, and a bobby pin, (optional).
Begin by cutting off a piece of duct tape about 2-2 1/2 inches long.Then cut off another one, slightly bigger than the first.
Put them on top of one another. They don't have to be perfectly lined up, we're going to fix that soon.
Trim off the excess tape so that you have straight end with no sticky parts coming off the edges.
Now fold it in half.
With your thumb and pointer finger, hold the folded tape at the very edge, across from the two flaps, and fold out the two flaps slightly.
Push the two flaps completely back and hold it down.
Use a thin strip of duct tape to hold it together. Congratulations! You've made your first duct tape bow! You can tape on a bobby pin or barrette so that it can go in your hair, or it can be a cool bow tie! Have fun!
Wednesday, March 9, 2016
How To Finger Knit!
Difficulty Level: Easy
Hi, Crafters!Long before I knew how to knit or crochet, I learned to finger knit. I was about six. That's proof of how easy it is! Once you learn how, it's so easy you can do it without thinking! What are we waiting for? Let's get started!
All you'll need is yarn, some scissors... and your hand!
Begin by holding your hand in front of you, palm facing you, and wrapping one end of the yarn around your thumb a couple of times. If you're right handed, use your left hand. If you're left handed, use your right hand! This is just to keep the yarn in place. You'll unravel it later.
Now slip the yarn under your pointer finger. Bring it up and over your next finger, then bring it under the next, and finally, over your pinkie.
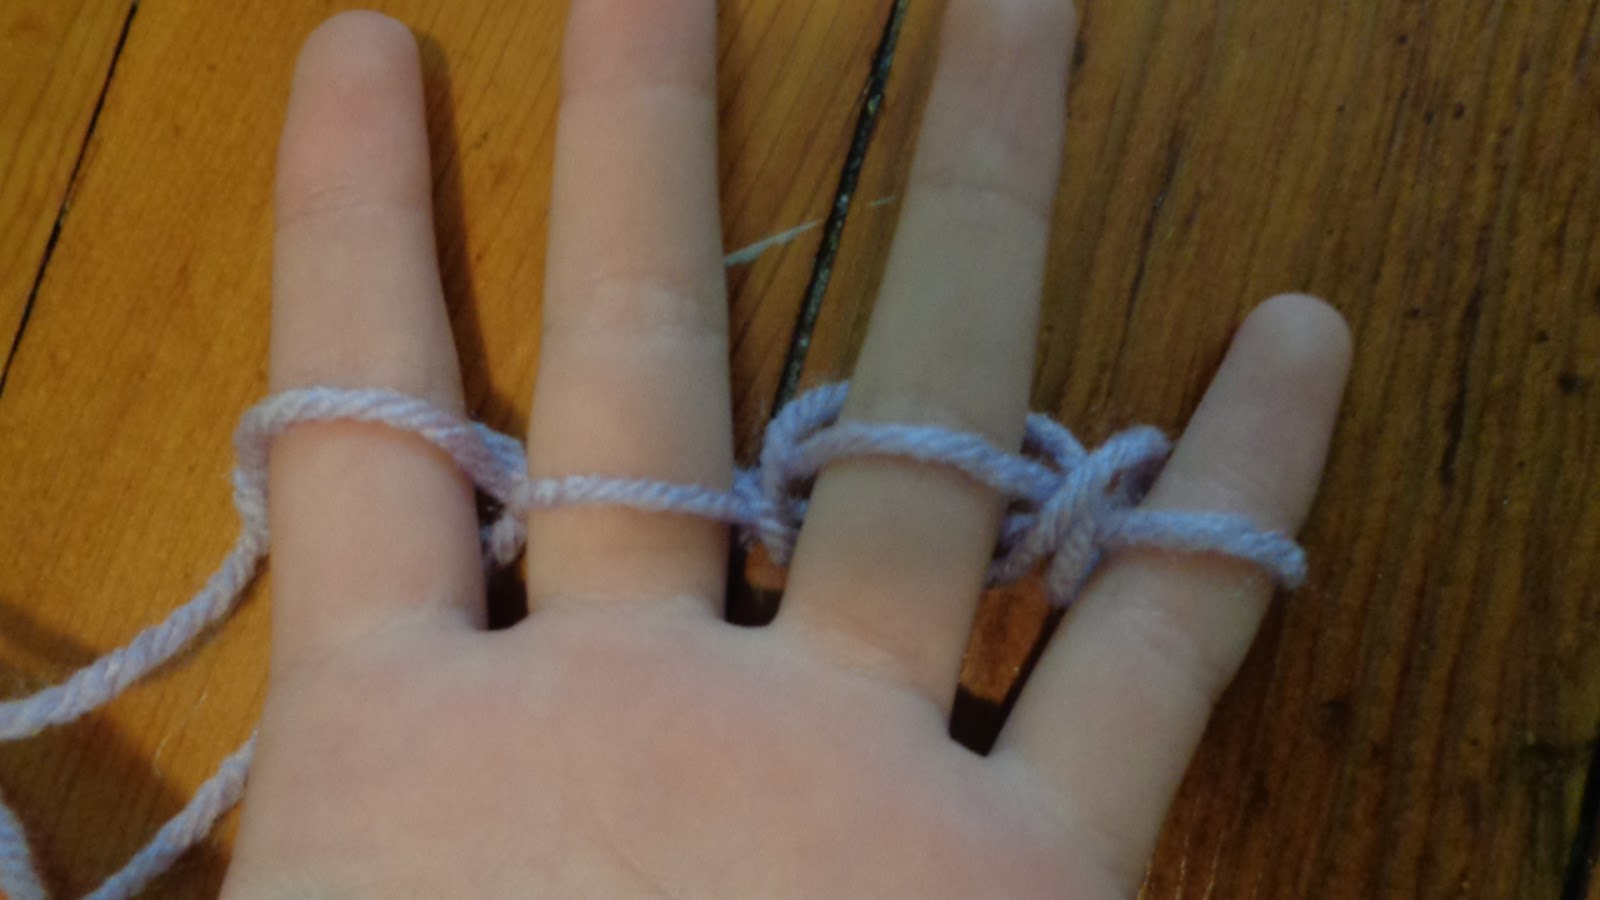
Then bring the yarn behind your pinkie, over your ring finger, (which shouldn't have any yarn on it) behind your middle finger, and over your pointer finger. Each finger should have one loop of yarn on it. Then do it again! Under, over, under, over, around, over, under, over. Now each finger should have two loops of yarn on them, like this:
On your pointer finger, loop the bottom part of the yarn over the top one and then over the tip of your finger. Let it drop there. Then do the same thing with the other fingers, and it should look like this on the front...
...and look like this on the back!
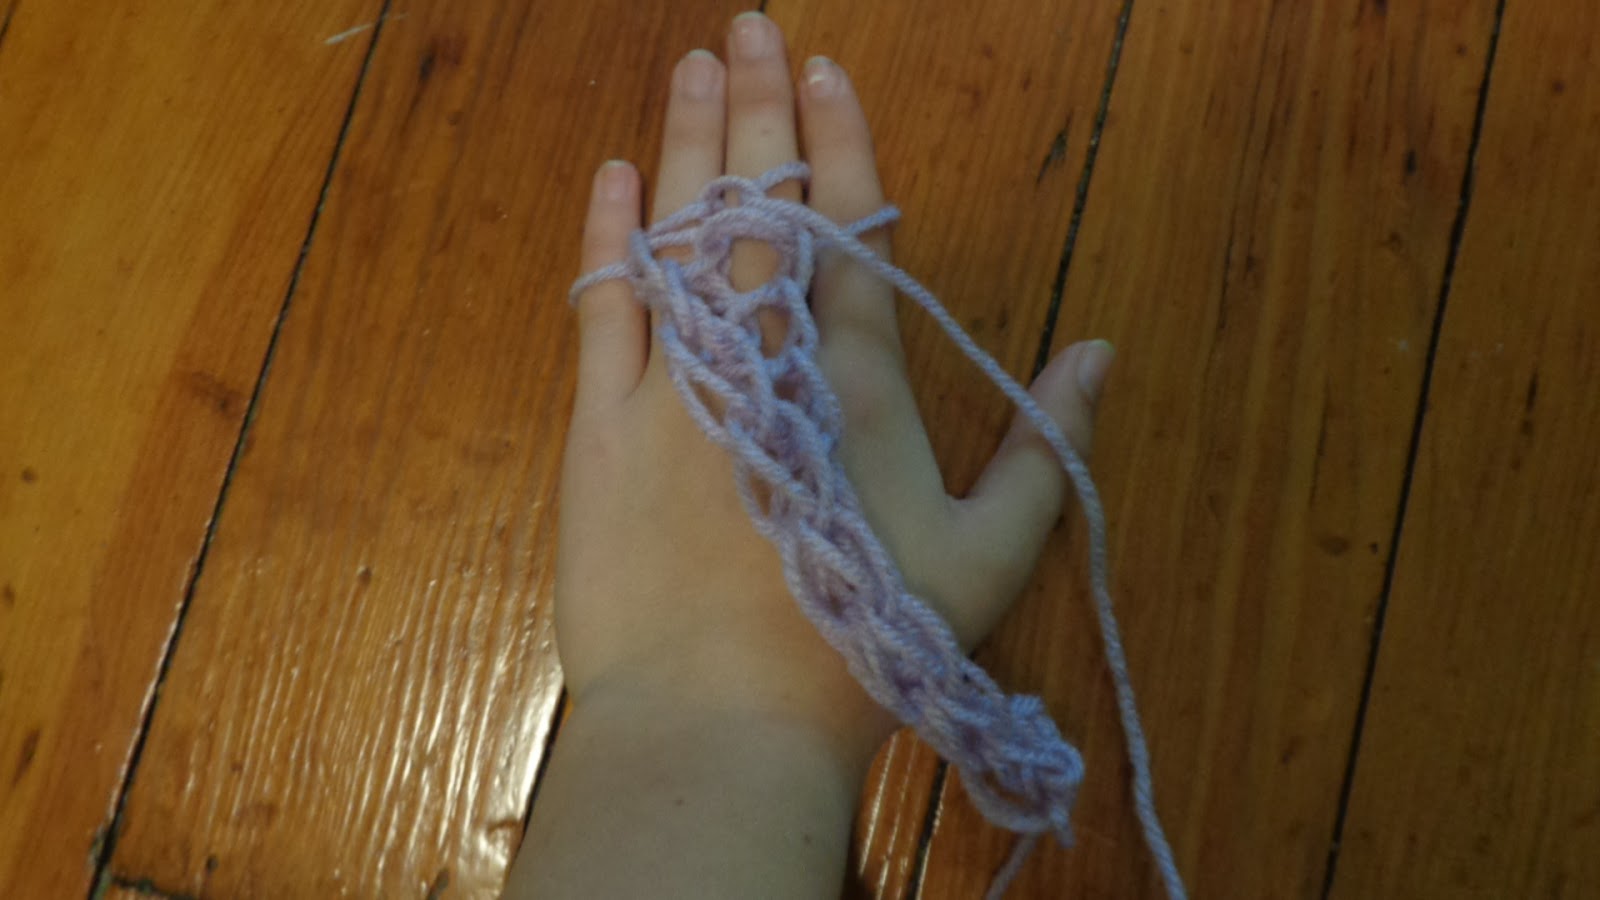
Then do the under, over, under, over technique again, just once, so that you have two loops on each finger again. Then bring each one over, and repeat.
After a while, it should look like this on the back. But pull it tight and...
It should look like this!
Now keep going...
And going...
When it's long enough, bring the pinkie loop over top of the ring finger loop like this.
Bring the loop over the top and bring the last loop on your ring finger over to your middle finger.
Bring that bottom loop over the top and bring the remaining loop to your pointer finger.
Bring the last loop over the top, which leaves one last loop. Take it carefully off your finger and cut the string of yarn, leaving a small amount to string through the loop and pull tight. Here's the finished product!
It's a bit skinny, but it can be made into headbands, belts, scarves... there's even a way to weave it into a hat! But that's another tutorial. For now, goodbye, and happy crafting!
Subscribe to:
Posts (Atom)